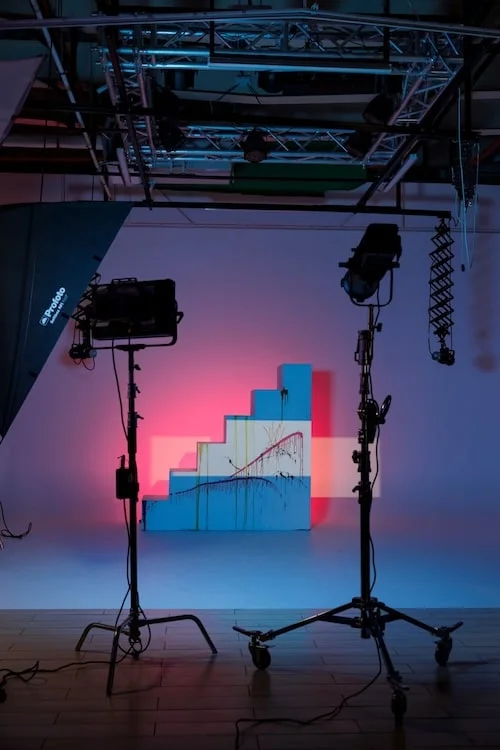
Yes, you can rent a studio and shoot yourself with nobody else in the room. Most of the solo bookings we take on a weekday morning are exactly that: one person, one tripod, one set of clothes on a hanger. What decides whether you leave with usable frames is not how photogenic you are. It comes down to three mechanical things: how you lock focus when nobody is standing on your mark, how you fire the shutter without walking back to the camera every take, and how much of your paid hour disappears into setup before the first real frame.
Solo studio shoot, defined: a self-service studio rental where the creator books the space and operates the camera themselves, with no photographer, assistant or crew. At SkyLight in Dubai Investment Park 2, a standard photo zone runs from 700 AED for two hours, the cyclorama runs as a two-hour block from 700 AED, and video bookings start at 750 AED per hour. You bring the camera. We hand over the room, the sets and the light.
I am Artur Gall. I have run SkyLight in DIP2 since 2020, and I have watched several hundred people work alone in these rooms, from e-commerce sellers photographing their own stock to founders shooting their own headshots at 9pm. The ones who walk out happy all do roughly the same handful of things.
Can you really shoot alone, and when you should not try
Working alone is comfortable for anything where the frame stays still and your position is fixed. It gets hard the moment either of those moves.
Solo works well when you control the variables. Your camera is locked on a tripod, your body sits inside a taped mark on the floor, one light does the heavy work, and the shot list is short enough that you are not rebuilding the set every ten minutes. Under those conditions a single person can produce a portrait set, a product catalogue or a week of talking-head clips in one booking.
Solo starts to fight you when the subject moves unpredictably, when you need to see a face you cannot see, or when time pressure is real. Jumping shots, flowing fabric, a toddler, a client waiting on delivery the same evening. In those cases the cheapest fix costs a coffee: one friend who can watch the screen and press a button.
There is also the option nobody sells you. Shoot alone for the first hour, then decide. If your keeper rate from the first look holds up, keep going. If you are twenty minutes into fighting focus, simplify the setup instead of pushing through it.
If you are still deciding whether solo makes sense for your project, message us the shot list on WhatsApp and we will tell you straight whether it is a one-person job.
The solo kit: five things that do the work of an assistant
Your assistant gets replaced by five objects, and none of them are expensive.
| What you bring | The job it does | Notes |
|---|---|---|
| Tripod at your standing eye height | Holds the camera where an operator would stand | Bring your own, do not plan on borrowing one |
| Wireless remote or camera phone app | Fires the shutter from your mark | Canon Camera Connect, Sony Creators’ App, Nikon SnapBridge |
| Laptop or iPad plus tether cable | Lets you check focus at full magnification | Canon EOS Utility, Sony Imaging Edge Desktop, Nikon NX Tether |
| Interval shooting (in-camera menu) | Removes the trigger from your hands | Set 3 to 5 second gaps for movement |
| Gaffer tape | Holds your marks for feet, tripod and light stand | Two dirhams of tape saves twenty minutes |
The tether is the one people skip and then regret. You will never judge sharpness on a 3-inch camera screen from four metres away, and a frame landing on a laptop a second after you shoot it turns guesswork into checking. Bring a USB cable of at least three metres and tape it down so you do not trip over it mid-take. The phone app does a lighter version of the same job: live view and a shutter button on a screen you can hide behind your back.
The tripod is where I see the most expensive mistake. A camera propped on a chair, angled up at you, is the fastest way to make a self-shot portrait look self-shot. Height matters more than the brand on the leg.
Pack that list the night before, so your first studio hour goes into light rather than into a shop run.
Focus is the whole problem when you are in the frame
Autofocus does not know that you plan to be the subject. Solve focus first, and the rest of a solo shoot is easy.
Start with the setting that ruins more self-portraits than anything else: focus sitting on the shutter button. If a half-press triggers autofocus, then every press of your wireless remote re-runs it, and the camera will cheerfully grab the backdrop behind your shoulder while your face is turned. Move focus onto the AF-ON button instead, which most menus call back-button AF, and set shutter half-press to off. Now the remote only fires. Focus stays exactly where you put it.
Eye AF is better at self-portraits than people expect, with limits worth knowing. It holds well when your face is toward the lens and large enough in the frame for the detector to find it. It gets unreliable in profile, in strong backlight where the contrast the detector needs is washed out, and at full-length distances where your head is a small part of the frame. For head-and-shoulders work, let it run. For anything wider, do not trust it alone.
The reliable method for wider frames is manual focus on a stand-in. Put a light stand, the back of a chair or a suitcase exactly where your head will be. Punch the live view to full magnification, focus on a hard edge, then switch the lens to manual so nothing can drift. Focus peaking helps here: the coloured shimmer tells you where the plane sits without guessing. Tape the floor, remove the stand-in, step in, and stay inside the tape.
One more thing that fixes half of all solo focus misses: give yourself depth-of-field margin. At portrait distance on a full-frame body, f/5.6 to f/8 survives a body sway of a few centimetres. Shooting yourself at f/1.8 because the bokeh looks nice is why people go home with a card full of sharp ears and soft eyes. Stop down, add light, sleep better.
Then verify before you shoot another eighty frames. Three frames, walk to the laptop, zoom to 100 percent, check the eyes. Do that at the start of every new look rather than at the end of the session.
Lighting yourself without an assistant
One light plus a reflector beats two lights when you are alone, every time.
The reason is walking distance. Every extra head is another object you have to cross the room to adjust, re-test, and re-check on the screen. A reflector on a stand changes your fill ratio by being moved twenty centimetres, and you can do that with one hand while standing on your mark.
The setup that works for almost any solo portrait: key light at roughly 45 degrees to one side and about 30 degrees above your eye line, feathered so the hot centre of the modifier passes slightly in front of your face rather than blasting it. Reflector opposite at the same 45 degrees, close enough to open the shadow side. Add a rim light behind and to the side only if you want separation from the background, and accept that it is the light most likely to spill into your lens.
Rig it against the stand-in object on your mark, then take one frame with your own hand held at the mark and check exposure on the tether. Your hand is a decent proxy for skin.
Continuous LED is friendlier for solo work than flash, because what you see in the live view is what you get and you can judge the shadow on your own face before you commit. Flash gives you more power and freezes movement, at the cost of guessing between frames. On our video bookings two Profoto flash heads with modifiers are included in the rate at no extra charge. On a photo booking that same kit can be added separately on request, so tell us when you reserve rather than assuming it is waiting on the stand.
If you have never rigged a light by yourself before, book an hour longer than you think you need and treat the first one as practice. Nobody rigs a good key light in ten minutes on their first try, and the hour costs less than a wasted session.
The rhythm: self-timer, interval, or tether
Self-timer for single considered frames, interval shooting for movement, tether when you need to check the file rather than the pose.
The self-timer is fine for still, posed work, and it has a hidden feature worth using: most bodies let you set a timer that fires a burst of several frames instead of one. Two seconds of delay plus five frames gives you a small window where your face relaxes out of the «I am waiting for the beep» expression. That relaxed third or fourth frame is usually the one you keep.
Interval shooting is the better tool for anything with movement. Set the camera to fire every three to five seconds for thirty frames and you get a working window of roughly two minutes where the trigger stops existing. You move, adjust, breathe, change the angle of your chin, and the camera keeps clicking. If you are on flash, keep the interval longer than the recycle time of your heads or every second frame comes back dark.
Tethering earns its place as a quality check rather than a trigger, though most tether software also puts a shutter button on screen, which helps when the laptop sits within reach of your mark.
Whichever method you pick, mark the floor with tape before your first frame so you can return to the exact focus plane after a break. Expect the first ten or fifteen frames to be throwaway warm-ups, because everyone’s are. And work in short bursts rather than holding a pose, since a face frozen for four seconds reads on camera as a face frozen for four seconds.
Pick one method per look and stay with it. Switching between timer and interval mid-session is how people burn a paid half-hour in the camera menu.
How many hours to book for a solo shoot
Book more time than the shooting itself needs, because working alone moves the setup onto your clock.
Here is the honest breakdown from what I watch happen in the rooms, given as practical ranges rather than promises. Your first session in an unfamiliar space always lands at the slower end.
| Stage of a solo session | Typical time |
|---|---|
| Arrive, unpack, change, mark the floor | 15 to 20 minutes |
| Rig the light and lock focus on the first look | 20 to 30 minutes |
| Shoot one look properly | 20 to 30 minutes |
| Change outfit, touch up | 10 to 15 minutes |
| Re-rig light and focus for a new look | 10 to 20 minutes |
| Pack down and clear the zone | 10 to 15 minutes |
What that means in booked hours: one look, done properly and solo, takes about 1.5 hours end to end. Two looks fit in 2.5 to 3 hours. Three looks need 3 to 4 hours unless you keep the same lighting and only change clothes. At 700 AED for two hours in a standard photo zone, a three-hour solo session is roughly 1,050 AED for the room.
Most solo bookings we take are two hours, and the pattern is consistent: around forty minutes vanish before the first frame anyone would keep. That is simply what one pair of hands costs. Plan for it and two hours is comfortable. Ignore it and two hours turns into a panic.
The cheapest way to buy back time is to reduce decisions, not to rush. Same light for all three looks, different clothes and different background. You will finish early and your files will be more consistent to edit.
Check the current blocks and minimums on the photo studio rental price page and book with a spare half hour rather than a tight fit.
What is easy to shoot alone, and what is not
Difficulty tracks one variable: whether you are behind the camera or in front of it.
| What you are shooting | Solo difficulty | Why |
|---|---|---|
| Flat-lay and tabletop product | Easy | You stay behind the camera, only your hands enter frame |
| E-commerce packshots on white | Easy | Fixed camera, fixed light, subject does not move |
| Headshots and personal brand portraits | Medium | Focus and expression both need managing from inside the frame |
| Seated talking-head video | Medium | One position, one focus plane, long takes |
| Beauty and close-up portraits | Hard | Focus tolerance at close distance is centimetres |
| Fashion in motion, jumps, movement | Hard | The focus plane and the moment both move; expect a low keeper rate |
| Two-person or group shots with you in frame | Not worth it alone | Somebody has to watch the frame |
Product work is where solo shooting genuinely wins. There is no reason to pay anyone to press a button while you style your own items, and the setup stays valid for hundreds of frames.
Portraits sit in the middle, and they are the most common solo request we get. If you are shooting your own headshots, keep the frame at head and shoulders so Eye AF has something to hold, run interval shooting, and give yourself twice the frames you think you need.
Movement work is the honest «bring someone» category. You can get a great jumping frame alone using interval shooting and patience, but you will shoot four hundred frames for it. That is fine if you booked for it and miserable if you did not.
Match your shot list to that table before you book, and cut anything from the bottom rows unless a second person is coming.
Which studio zone suits a solo creator
The best solo zone is the one where your mark stays valid for the whole session.
The cyclorama is the easiest room to work alone in. It is 7.5 × 5.5 m of seamless wall with no corner and no props, so once your tape is down, your focus distance and your light angle stay true for as long as you want. Nothing in the background needs checking between frames. The trade-off is that a bare wall gives you nothing to hide behind, so all the work falls on light, posing and wardrobe.
Furnished sets have an advantage solo shooters underrate: furniture anchors your body. A chair in the living room set or a counter in the kitchen set gives you a mark you can feel without looking at the floor. Sit, lean, repeat. The cost is background discipline, since a cushion out of place will show up in the file and you are not standing behind the camera to catch it.
The loft sits between the two. Character in the frame, more to watch, more rewarding when it works.
Green screen is the one zone I would not recommend for a first solo session. Even lighting across the cloth and enough distance to avoid spill are both things you cannot properly judge while standing on the mark. Bring a second pair of eyes for that one.
Across all seven sets, the photo rate covers up to 8 people per zone, so nothing stops you bringing a friend to click the shutter and hold a reflector.
Tell us your look on WhatsApp and we will suggest the zone that needs the least babysitting for a one-person session.
One boundary worth naming
We rent the room. We do not shoot for you.
Nobody at SkyLight is assigned to your booking as a photographer, an assistant or a light tech. We hand over the zone, show you where the power and the stands are, and get out of your frame. If what you actually want is a professional operating the camera while you perform, that is a production service and a different kind of company. A lot of Dubai creators genuinely prefer the other model: their own camera, their own pace, nobody watching.
One thing that follows from this: ask your questions when you book, not at 8pm on a Friday when you are already standing on your mark wondering which socket runs the far wall.
How to book and what to bring
Book by WhatsApp, arrive with your own camera support, and give yourself half an hour of buffer.
Your packing list for a solo session: camera and lens, tripod at your standing eye height, wireless remote or the camera app on your phone, laptop or iPad plus a tether cable of three metres or more, spare batteries, two memory cards, gaffer tape, and your clothes on hangers rather than folded in a bag.
The logistics that make solo work easier here: we are in DIP2, SP Warehouses, 8/47 Street, roughly ten minutes from Expo City, with parking right at the door so you are not carrying a case across a car park. There is a changing room and a makeup station that sit outside the shooting zones, which means you can leave your kit rigged and your floor marks untouched while you change looks. Doors are open daily from 09:00 to 23:00, so evening sessions after work are normal rather than a special request.
To book, send us the date, the hours and the zone you want on WhatsApp. If this is your first studio rental in Dubai, read the what’s included in a studio rental breakdown first, so you arrive knowing what is already rigged and what is still in your bag.
Written by Artur Gall, CEO and founder of SkyLight Studio. Running the studio in Dubai Investment Park 2 since 2020.
FAQ
Can I shoot photos of myself in a studio alone?
Yes. Rent a zone, mount the camera on a tripod, lock focus on a stand-in object placed where your head will be, and fire with a wireless remote, a self-timer burst or interval shooting. Most solo bookings at our studio work exactly this way, with no photographer involved.
What equipment do I need for a solo studio shoot?
A camera, a tripod tall enough to reach your standing eye level, a wireless remote or your camera’s phone app, a laptop or iPad with a tether cable to check focus at full magnification, spare batteries and cards, and gaffer tape for floor marks. Lighting is already in the room.
How do I set up lighting for self-portraits without an assistant?
Use one key light at about 45 degrees to the side and 30 degrees above your eye line, with a reflector opposite for fill. Rig and test it against a stand-in object on your mark, then check exposure with your own hand at the mark before you start. One light and a reflector are easier to control alone than two heads.
How long should I book a studio for a solo shoot?
About 1.5 hours for one look, 2.5 to 3 hours for two looks, and 3 to 4 hours for three. Setup, wardrobe changes and pack-down all land on your clock when you are alone, so add a half-hour buffer to whatever you estimate.
Does eye autofocus work for self-portraits?
It works well when your face is toward the lens and fills a reasonable part of the frame, which covers most head-and-shoulders work. It becomes unreliable in profile, in strong backlight, and at full-length distances. For wider frames, focus manually on a stand-in and stay inside a taped mark.
Remote trigger or self-timer, which is better?
A remote for posed single frames, since you control the exact moment. A self-timer with a burst of several frames for expression, because the relaxed frame comes after the first one. Interval shooting for anything with movement, so the trigger stops existing entirely.
What is easiest to shoot alone?
Flat-lay, tabletop product and e-commerce packshots, because you stay behind the camera and the setup holds for hundreds of frames. Headshots and seated talking-head video are manageable. Movement, beauty close-ups and anything with a second person in frame are where a helper pays for themselves.